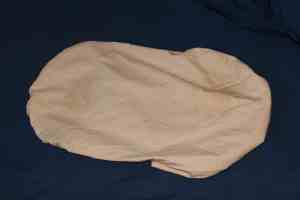
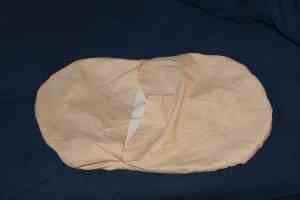
I’m very much a “fly by the seat of your pants” type of sewer, so I unfortunately don’t have a pattern or very precise measurements for the topponcino. However, I can share with you how I made it and you can check out the pictures of my topponcino, in case you want to make your own.
Materials:
- muslin fabric (or other thin cotton fabric) for topponcino
- soft cotton fabric for cover
- cotton batting
- embroidery thread
- sewing machine (or needle and thread)
Cut out two ellipses from the muslin, about 30 inches long by 15 inches wide (leave 1/4″ seam allowance). Place right sides together and sew along the edge of the ellipse, leaving about 12″ open (so you can insert the batting). Turn the sewn pieces inside out so the right sides are showing.
Place the muslin ellipse on top of several layers of batting (3-4 layers, depending on the thickness of the batting and on how thick you want your topponcino to be). Trace the elliptical shape on the batting and then cut an ellipse from the layers of batting. Insert these layers of batting into the muslin ellipse, making sure that they don’t bunch up.

Using embroidery thread, sew through the muslin and batting at several points on the surface of the ellipse so that the batting stays in place. Then sew the open gap in the muslin. Now you have a topponcino.
To make the topponcino cover (like a pillow case), place your topponcino on your cotton fabric and trace the ellipse, leaving a 1″ seam allowance. This will be the top of the topponcino cover.

To make the underside of the cover, repeat the process of tracing on the cotton fabric but this time make the resulting elliptical shape about 4-5″ longer than the previous ellipse (so you can have an open seam from which to remove the topponcino). Cut this longer piece in half and hem the straight edges. Match up the top and underside of the cover, with right sides facing each other. Sew all around the ellipse (note: the two underside pieces will overlap a little bit). Turn the cover inside-out and iron.

Insert the topponcino in the cover and you’re done! I suggest you make 2-3 covers, especially if your little one is prone to spitting up.
Happy sewing, and let me know if you have any questions!


Perfect! Definitely agree with needing 2-3 covers. As we know, babies can get a little messy!
And who has time to be doing laundry daily?! 🙂