Practical Life

Mealtime with Baby

placematTable manners… Healthy eating habits… Self-control. We all want our children to develop these abilities, but it’s hard for parents to know how and when to start! Did you know that children have the potential to develop these qualities from the time they start showing interest in solid food?

While you might think it’s impossible to instill these qualities in your baby or toddler, it’s really not that hard if you have the right expectations and tools.  Click here to learn more about Montessori mealtimes and then watch a short video!

Uncategorized

Turning Picky Into Practical

Toddlers are famous for their food fixations.  I’m blessed to be raising a very adventurous eater, but even Zach has some toddler quirks that would drive me insane if I chose to let them bother me.

This morning, I pulled out a container with a few strawberries from the fridge.  I asked Zach if he’d like some with his breakfast and he said yes.  I told him I had to rinse them first, and he flipped out.  While he screamed, I washed the strawberries, put them in a bowl, and took them to the table.

(Yes, I know I should’ve acknowledged his upset, asked questions to clarify his discontent, blah blah.  Honestly, this was pre-caffeine and I’d been up since 2am with a kicking fetus and a coughing toddler who hogs the bed and puts his feet in my face.  He’s lucky I didn’t eat the strawberries myself.)

He sat down, pushed the strawberries away, and said: “I don’t want them.”  I was genuinely puzzled, as they are one of his favorite foods.  I almost said, “That’s fine, you don’t have to eat them,” but fortunately my husband (who doesn’t have a kicking fetus in his belly nor toddler feet in his face, and could probably sleep through both) stepped in first.

“What’s wrong,” he asked.

“They’re wet,” Zach answered.  “I don’t like wet strawberries.” (Mind you, he’s happily devoured mountains of wet strawberries all his life.)

Now, I am NOT the kind of mom who will bend over backwards to make the food look just right for her picky toddler.  I had a million things to do, and I wasn’t about to hand-dry each strawberry.  But his quirk gave me an idea.  I took a paper towel, placed it next to his bowl, and showed him how to dry his own strawberries.

Problem solved!!  He was incredibly focused and productive, and even gave my husband a lesson on how to dry strawberries.

I wonder how many food quirks could be nipped in the bud if, instead of taking it personally or labeling the child as picky, we could empower him to to be an active participant in his own need for order.

IMG_2364 IMG_2365

Uncategorized

Pom-Poms vs. Broccoli

Practical Life activities should be, above all else, practical: real activities that have a purpose and a goal. Practical Life IMG_0309should never, EVER be busy work. Busy work is insulting to the child’s intelligence and developmental drives.

So, let’s say you want to introduce transferring with tongs. Instead of the ubiquitous pom-poms you see all over Pinterest, how about using broccoli?

Here’s what I did with Zach (who just turned 3), when he asked if he could help in the kitchen:

I had already chopped some broccoli (before he asked to help), so I put it in a bowl and had him transfer it piece by piece from the bowl to the hot buttered pan with a pair of long tongs (he has small ones but I didn’t want him to burn himself by getting his hand too close to the pan).

Then, I showed him how to use the tongs to toss the broccoli so it would cook evenly. When the it was ready, I invited him to transfer it back to the IMG_0306bowl.

He’s been cooking over a hot stove for over a year now, so I only had to remind him at the beginning to work carefully and not touch the pan or the heat source. When he was transferring the cooked broccoli back to the bowl, he dropped one stalk.  He picked it up with his hand, and immediately dropped it again.  It was hot!  Good learning experience…

He was so proud of his contribution to our meal, and he learned so much in that short amount of time.

I don’t know about you, but I’ll take broccoli over pom-poms any day.

Uncategorized

10 Quick Tips for Baking with Your Toddler

Note: You’ll find our fabulous, healthy, and toddler-approved recipe at the end of this post! Try it out and let us know if you like it!

I love to cook, and I’d love to include Zach every time I’m in the kitchen.  But as a working mom, I rarely get more than 15 minutes to cobble together a semi-healthy meal during the week.  Instead of pressuring myself to involve my toddler in weeknight dinner preparation, Zach and I bake muffins on the weekends, and we’ve been making the same recipe for the past couple of months.

IMG_0239

I didn’t have in mind the Montessori principle of repetition when I decided to repeat the same recipe over and over.  It was simply a tasty and healthy recipe that worked well, and I didn’t have time to research new ones.  However, it soon dawned on me that revisiting the same recipe was EXACTLY the right thing to do.  Through repetition, both Zach and I have honed our skills and get more enjoyment from the activity.  Since I know the recipe, I can be well-organized, which allows me to observe Zach more closely.  I can notice what skills he needs to work on and which new responsibilities I can delegate to him.  Zach, meanwhile, becomes more confident in his abilities and his self-esteem increases with each achievement.

Here are a ten things I’ve learned from baking with my two-year old:

1. PREPARE: I try to pull out all the ingredients and equipment before I start, and leave them out of arm’s reach of my toddler. Children have a natural impulse to explore with their hands, and you really don’t want your child to test the law of gravity on a carton of eggs or a bag of flour while you’re searching for the muffin tin.

2. KNOW YOUR RECIPE: If there are any time-consuming preparation steps that don’t involve your toddler (such as defrosting), do them ahead of time.

3. BUSY HANDS: If you need to divert your attention from the cooking process (to put things away, wash an item, etc.), give your toddler something to do with his hands. I like the recipe that I use because it involves a lot of stirring, which Zach happily does while I put items back or grab a cleaning rag.

IMG_02414. MODEL AND TRUST: Our recipe involves cracking two eggs. I crack the first one slowly into a small bowl, pausing after each step, while Zach watches. Then I ask him if he wants to do the second egg. The first couple of times, he said, “Mommy do it”. The last two times we’ve made muffins he’s cracked the egg on his own, exclaiming “Zachy did it!”.

5. TALK, TALK, TALK: Baking is the ideal time to increase your toddler’s vocabulary. I give Zach the names of the equipment and ingredients, and isolate the name of each action as I am doing it (e.g. “CRACK the egg”, “stir”, “grate”, etc.). However, if Zach is engrossed in an activity, I hold my tongue until he’s done so I don’t break his concentration! I can always point out what he did afterwards: “You cracked the egg by yourself!”

6. TAKE TURNS: If there’s something that your toddler is not quite able to do yet (like for Zach, grating carrots effectively) take turns. Show him how to do it, then tell him it’s his turn. Give him a chance to try and then say, “When you are finished, it’s my turn again”. If he’s struggling or doesn’t feel capable, you’re giving him a pressure-free way of passing the baton back to you without having to say “I can’t do it”. And when he wants to take charge, you’ll know because he’ll exclaim: “My turn!”

7. INSPIRE, THEN RETIRE: When your child is ready to take charge, let him. I used to spoon the batter into the muffin cups and have Zach use the spatula to help scrape the batter from the spoon to the cups. Eventually, he decided he wanted to take charge: now he scoops the batter with the spoon, and I’m his helper with the spatula!photo (10)

8. CLEAN UP: As soon as those muffins make it into the oven, I give Zach a wet rag and ask him to wipe down the counter. Then he gets down from his Learning Tower and I give him the bag of flour, the carrots, and the carton of eggs to take to the fridge (one at a time). Then I tell him to take the measuring spoons and the platic mixing bowl to the sink. I also tell him to throw the egg shells and carrot tops into the trash. Finally, he uses the dustpan and brush to clean up any flour that fell on the floor. I don’t ask if he wants to help clean up; I tell him with a smile: “It’s time to clean up now.” I also don’t ask, “Can you wipe the counter?”. I show my confidence in him by stating, “You can wipe the counter.”

9. SHARE HIS ACCOMPLISHMENTS: When my husband comes home, Zachary serves us all muffins and we tell daddy everything we did to make them. I point out to my husband the steps in which Zach was involved, and make note of any new achivements (i.e. “Today Zach cracked an egg by himself!”). This, more than praise, helps a child understand that his contribution to the family is appreciated and sets the foundations for meta-cognition (self-evaluation of one’s own learning process).

And above all…

photo (11)10. CHECK YOUR ATTITUDE: You might think that baking with your toddler is a cute and endearing activity, but for your child it is serious business. He’s mastered a wide range of skills in his first two years of life, and now he’s being driven to understand: “What is my place in this family? How do I fit in? How do I contribute?” Practical life for your toddler is not about looking cute in an apron; it’s about self-reliance and contributing to the well-being of his social group (in a toddler’s case, his immediate family).  Make sure your approach reflects the importance of the activity!

Be patient, maintain a healthy perspective, and HAPPY COOKING!

Whole Wheat Carrot-Pineapple Muffins

(makes 12 small or 7-8 large muffins)

Ingredients:
1.5 cups whole wheat flour
1 tsp baking powder
1 tsp baking soda
1/2 tsp sea salt
1 tsp cinnammon

2 eggs
2/3 cups brown sugar
2/3 cup vegetable or coconut oil (melted)
1 tsp vanilla extract

1 cup grated carrot (about 1 large or 2-3 small carrots)
1 cup crushed pineapple (drained)

OVEN TEMP: Pre-heat to 350F

1. Work with your toddler to scoop each of the dry ingredients into a small mixing bowl (flour, baking powder, baking soda, salt and cinnammon)
2. Let your toddler stir the dry ingredients to his heart’s content, showing him how to hold the bowl with one hand and stir with the other.
3. Show your toddler how to crack an egg into a small bowl. Ask him if he’d like to have a turn. Remove any shells that fall into the bowl.
4. Let your toddler transfer the eggs into a larger mixing bowl. Work with him to add the following ingredients: brown sugar, oil, and vanilla extract.
5. Let your toddler stir the wet ingredients to his heart’s content (one hand on the bowl!)
6. Show your toddler how to grate carrots and ask if he wants a turn. Try not to be paranoid about him grating his fingers off. If he’s not into grating, take a turn and finish the job.
7. Drain the pineapple and measure it.
8. Take a turn stirring the dry and wet ingredients in their respective bowls, to ensure they are well mixed.
9. Have your toddler transfer the dry ingredients into the bowl with the wet ingredients.
10. CAUTION: This batter should NOT be over-mixed, or your muffins will be too dense! Let your toddler stir three or four times and then you should “take a turn”. Gently fold the ingredients until JUST mixed (some dry flour should still be visible) and then ask your toddler to add in the carrots and pineapple.
11. Finish folding in the carrots and pineapple gently. Did I mention not to over-mix?
12. Have your toddler put the muffin cups into the muffin baking tray.
13. Show your toddler how to spoon batter into the cups, using a spatula to scrape off the sticky mixture from the spoon. Your batter should stick to the spoon pretty well, making it easy for a toddler to transfer it to the cups without dribbling it everywhere. The cups should be no more than 3/4 full.
14. Put the muffins into the oven and bake for 30 minutes, or until you insert a toothpick and it comes out clean. When the muffins are ready, take them out and let them cool IN THE BAKING TIN for 10-15 minutes.
15. Clean up with as much enthusiasm as you cooked.

Uncategorized

Show & Tell

It might seem like Montessori parents like to show off what their children can do: “Look, my baby can drink from a glass!  My toddler can slice a cucumber!”  But honestly, our excitement has nothing to do with bragging.  At least for me, sharing my son’s accomplishments is about telling other people: “Look what YOUR child is capable of, and imagine the sense of competence YOUR child can develop!”

Parents who are new to Montessori often observe a classroom and think: “My child would never fit in.  He’s not capable of doing what those children can, or of behaving like those children do.”  I want you to know that, although all children develop at their own pace, your child CAN become self-sufficient at an early age.  Why is this important?  Because research confirms that children whose independence is supported feel capable of dealing with life’s challenges, have a higher sense of self-worth, and tend to have a more intrinsic motivation to learn.

Remember, too, that it’s never too late to modify your approach if you realize you have been holding back your child.  You might get some resistance at first, but if you know what every child is capable of, it will be easier for you to transmit trust and confidence to your child.

Here’s a great perspective from the book “Positive Discipline: The First Three Years” by Jane Nelsen:

When a baby is born, she is all but helpless.  It takes days, weeks, and months before she learns to control her own movements, reach and grasp, and walk on her own.  In her early weeks and months, your job as her parent is to keep her safe, to tend to her needs, to comfort her when she cries, and to be patient – very patient.  But as she grows into toddlerhood, you may be surprised at how much she can do that can help her develop a sense of capability.  On the other hand, if you do too much for her (in the name of love), she is likely to form the belief that she is not capable… Words alone are not powerful enough to build a sense of competence and confidence in children.  Capability comes from experiences of accomplishment and self-sufficiency, and from developing solid skills.

Uncategorized

Breaking Bread

My twelve-month old son loves LOVES bread.  If it were up to him, he’d eat nothing but bread at all three meals.  When he was younger, I could give him his food and then offer a piece of bread and he’d be content with the arrangement, but now that he’s keenly aware of the goings-on at the dinner table, he’s realized that there’s bread available at dinnertime.  Of course, to him that means that he can have bread instead of all the other food, and he’s prepared to throw a tantrum to get his way.  Being of Spanish descent, I’m not about to give up eating bread with a meal just because Zach is still developing impulse control.  Quite the opposite: I now make it a point to include bread with dinner precisely so he can work on this skill.

I recently read this insightful post by Janet Lansbury, and thinking of her advice helped me stay calm during a recent limit-setting opportunity.  Here’s what transpired…

We were having a tasty minestrone soup for dinner, with our usual bread.  Zach ate a couple of spoonfuls of soup, saw that his dad was eating bread with the soup, and decided he simply had to have bread.  He pointed wildly at the bread and made loud noises, so I said “You want some bread with your soup” and gave him a smallish piece.  He happily ate his bread and when it was gone he demanded some more.  I told him: “First you need to eat more soup and then you can have bread.”  I offered him a spoonful of soup and, as you might imagine, he lost it.

He gave an infuriated wail and then went into “silent-turning-purple” crying.  “He’s winding up,” my husband announced and sure enough, Zach finally let out a loud angry cry.  It took everything I had not to hand over the bread, not so much because his crying bothered me, but because I know it stresses my husband, and that in turn stresses me.  “First have some soup and then you may have some bread,” I repeated calmly, offering another spoonful.  Zach wailed and babbled, presumably telling me how much he wanted bread.  “I understand you want bread,” I said.  “But you also need to eat soup.”

He kept crying so my husband and I went back to eating our own soup.  It certainly wasn’t fun to eat while he screamed, but I had a feeling that this was a powerful teaching moment to help him understand that tantruming was not the way to achieve his goals.  Every couple of minutes I offered a spoonful of soup and he batted it away.  Without reacting, I would put the spoon down and go back to my meal.  Zach eventually saw he wasn’t getting anywhere with all the crying, so he calmed down.  I offered him some soup and he accepted several spoonfuls.  Then he gestured for bread and I gave him some.  Now, here comes the cool part: He finished his bread and not only did he not ask for more, but he grabbed for the spoon to have more soup!  We finished the rest of the meal in peace, with only a glistening crocodile tear on Zach’s cheek as a reminder of his outburst.

Last night we again had bread with our meal, and enjoyed all the food peacefully and in a balanced manner.  Will this be the last tantrum?  Hardly!  But I was glad to see that even at 12 months of age, children can understand limits and begin to develop impulse control.  And I was relieved that I was strong enough to maintain my resolve and composure during a crying fit, because that – not bread – is what he was really asking for.

Uncategorized

Food Fight

Yesterday at the park I struck up a conversation with a grandmother who’s visiting from Argentina to help her daughter, who just had her second child.  The older sibling, a little girl named Carla, is only 15 months old.  Carla’s grandmother told me that the little girl’s world has been turned upside-down with the baby’s birth, and for the past week she has refused to eat anything except fruit.

Every couple of minutes, the grandmother would interrupt our conversation to walk across the playground and shove a blueberry into Carla’s mouth.  She told me how worried they all were, because prior to the baby’s arrival Carla had been a good eater.  I told her that food is one of the few things over which children have control (bowel movements being another, to a certain extent).  When they feel their world has become unpredictable, they try to gain a semblance of control by using the only means at their disposal.   Carla is a bright and perceptive little girl, so she understands that her food intake is of great interest to the adults around her.

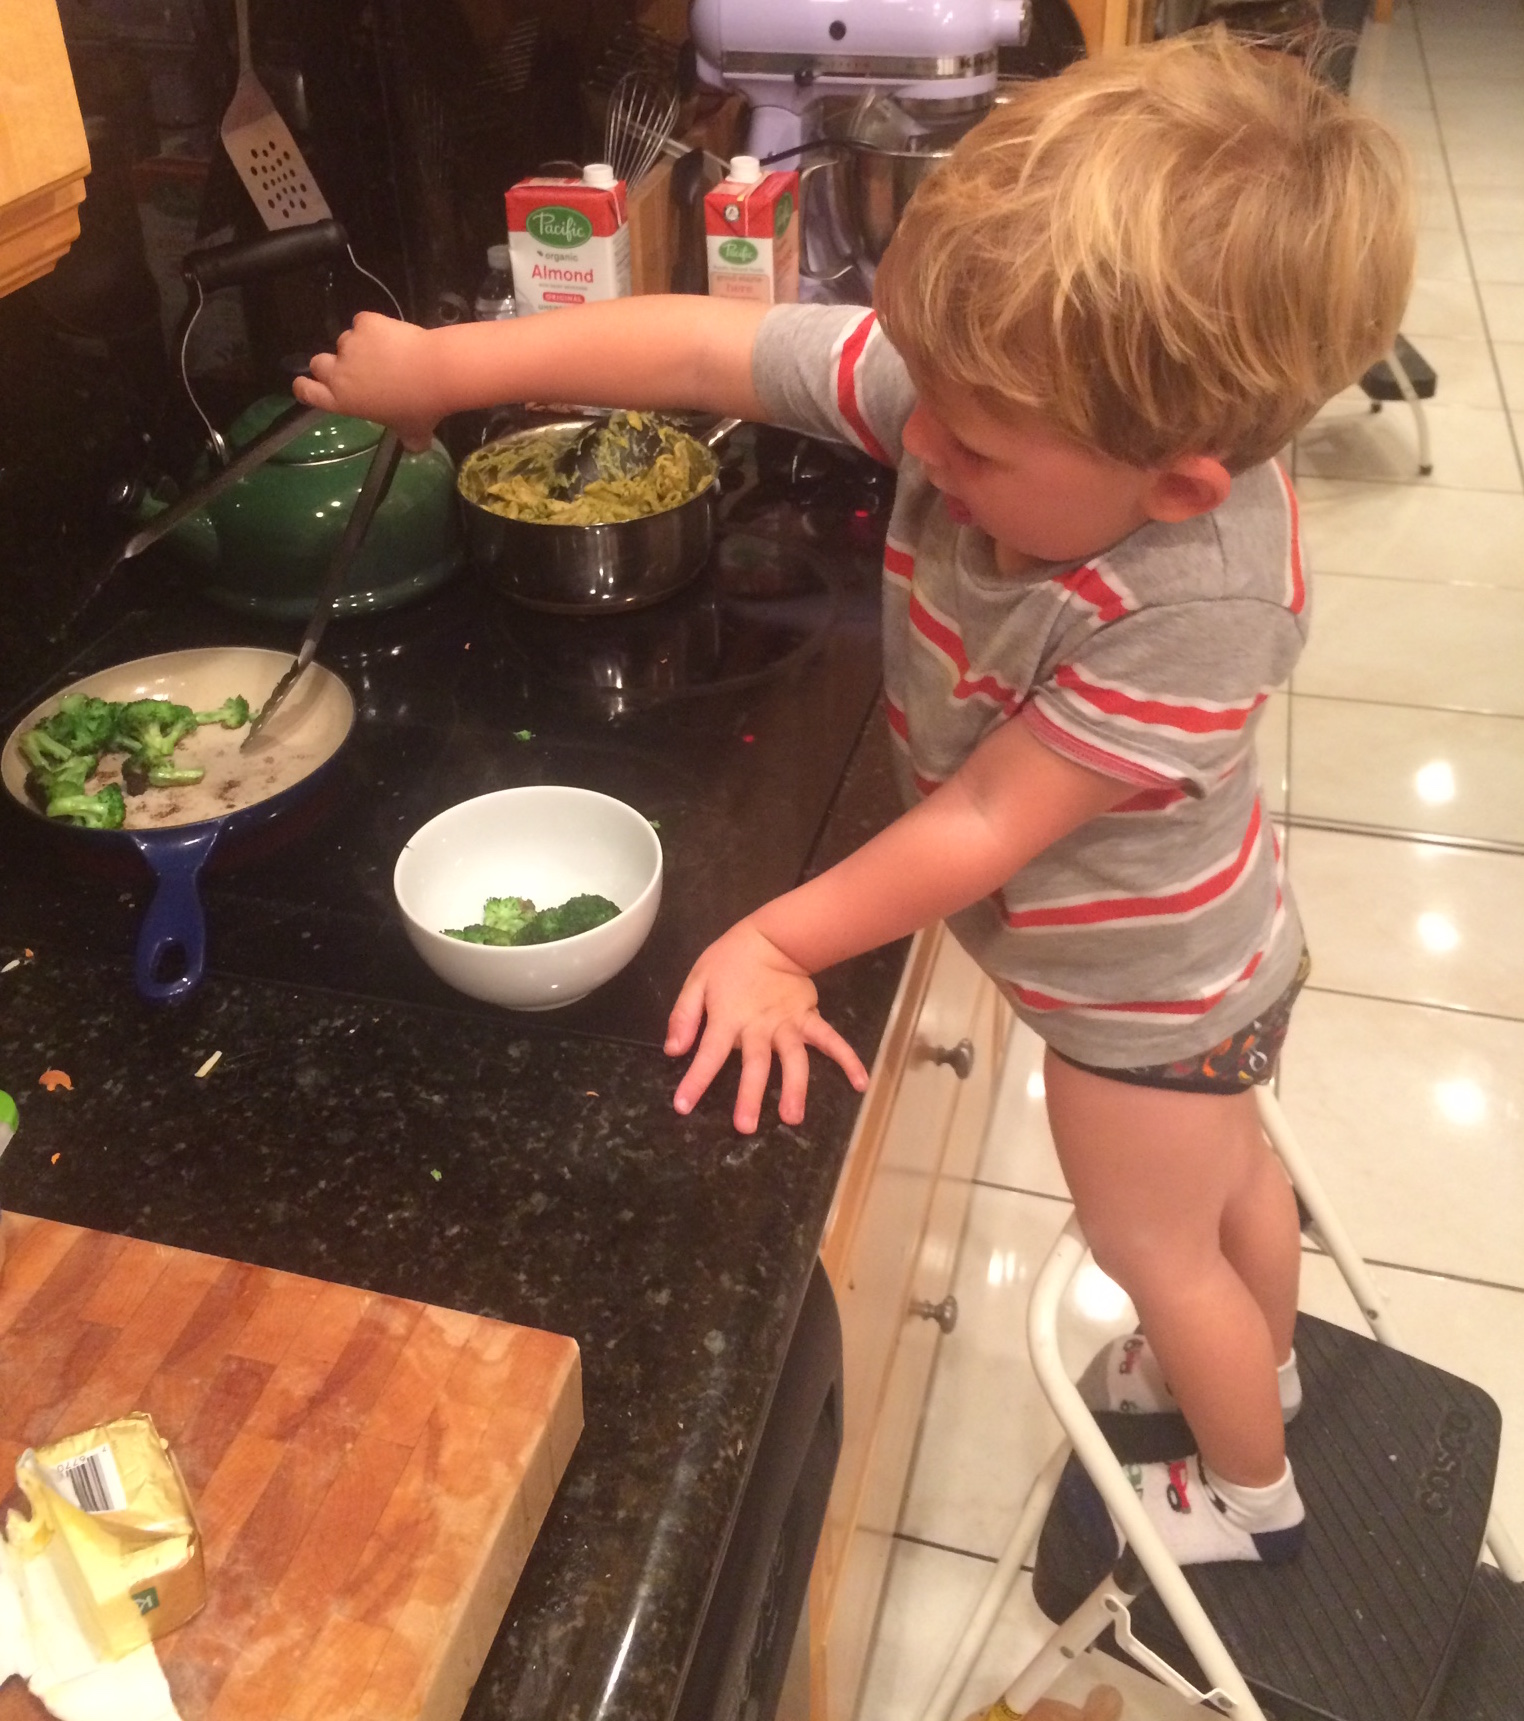
From my experiences as a teacher, I know that food is a hot-button issue among parents.  Most of the calls I received after school were from parents complaining that I didn’t make their children finish their vegetables!   Several times I saw one desperate mother strap her child into the car seat after school and then force-feed him the remainder of his lunch… Scenes like these hurt my heart, because I understand that the parents have the best intentions but also know that they’re making matters worse and setting up their child for a lifelong dysfunctional relationship with food.

I loved this article on helping your child establish a healthy relationship with food from the beginning.  Everything it says is spot-on and following this advice will help prevent or heal food-related issues.  The article also reminded me of a story from my childhood, which I want to re-post from my old blog as an example that a child’s relationship with food will change when your approach to mealtimes does, too.

*******************

When I was three years old, my family moved to a small condominium complex in Mexico City.  Our next-door neighbors, a registered nurse and her husband (a doctor), also had two young children.  The girl, Lorena, was my age, and we quickly became close friends.

Lorena was a pale and skinny little thing who was afraid of everything (including her over-bearing mother).  She would categorically refuse to eat anything except canned tuna fish.  Her mom would sit with her at the dinner table for hours, forcing her to gulp down cream of spinach or some other healthy food.  After hours of fighting (several times she even tied her down in desperation), her mom would break down and open a can of tuna.

Apart from the eating issue, Lorena suffered from a slew of “ailments”, including allergies to cats and mysterious rashes.  She took medicine constantly and was regularly covered in ointment to heal her hives.

When I turned five, my family and I moved to the countryside near San Diego.   My parents bought a beautiful hilltop  house with a swimming pool and two acres of open land.  The first summer we were there, my mom called Lorena’s mom and, after much negotiating, arranged for the little girl to travel with some relatives to San Diego so she could visit us for two months.

When Lorena arrived, she brought a small suitcase with her clothes, and a larger one filled with medication, ointments, and cans of tuna fish.  A letter from her mom stated: “Lorena is a very picky eater, and frankly it’s a struggle to get her to eat.  When you get tired of fighting with her, feel free to open a can of tuna since it’s the only thing she likes.”

My mom took one look at the quivering little girl, stashed the medications and tuna fish in the closet, and announced that it was lunch time.

“What’s for lunch?” my brother and I eagerly asked.

“Turkey sandwiches and carrot salad,” answered my mom.

“I don’t like turkey and I don’t eat carrots,” said Lorena.

“OK, then don’t eat,” replied my mom calmly.

“Can we eat her food?” we asked, ravenous after playing outside all morning.

“No, that’s Lorena’s food.  She’ll eat it when she’s ready,” answered my mom.

“I’m not going to eat,” replied the defiant five-year old, pushing her plate back and crossing her arms in front of her.  “I want tuna fish.”

“There’s no tuna fish,” said my mom patiently.  “There’s turkey sandwiches with carrot salad.”

My brother and I wolfed down our food, and when we were done, we grabbed Lorena’s hand and ran outside to play in the pool.  My mom put Lorena’s untouched food away and picked up the phone to arrange for swimming lessons, because five-year old Lorena didn’t know how to swim.

That evening, after chasing frogs, riding tricycles, and going down the water slide for five hours, we were called inside for dinner.

“I don’t want to eat any of that,” said Lorena upon eying the chicken, potatoes and vegetables my mom had prepared.

“Well,” answered my mom calmly,  “This is what’s for dinner.”

Lorena sat pouting with her arms crossed while my brother and I inhaled our portions and asked for seconds.

The next morning, we woke up to scrambled eggs and refried beans.

“I don’t like eggs or beans,” grumbled Lorena.

“Well, it’s what’s for breakfast,” answered my mom, while my brother and I piled our plates high.

To make a long story short, Lorena went on a two-day hunger strike.

On the third day, my mom served Lorena her usual portion of whatever was on the menu, and Lorena ate.  And ate.  And ate.

She ate vegetables, chicken, meat, potatoes, rice, eggs, milk, fish, fruit, and everything else my mother served her from then on.

Over her two month stay, the frail weakling of a child gained 10 pounds, achieved a healthy sun-kissed glow, and learned to swim.  Her allergies never manifested themselves (even though we had two cats) and she didn’t have a single rash during her entire eight-week stay.

Towards the end of the visit, my mom arranged for Lorena’s mom to spend a week with us in San Diego before flying back with her daughter.  When Lorena found out her mom would be arriving the next day, she broke into a rash and pooped in the pool.

And she refused to eat anything other than tuna fish for the rest of the stay.

Uncategorized

Using a Fork (with video)

During the past few months, I’ve given Zach many opportunities to explore eating with his fingers.  On several occasions I’ve offered him small pieces of fruit or steamed vegetables that he can grab with his hands and bring to his mouth.  I thought he would find this enjoyable, since he loves to eat, but it’s actually been super-frustrating for him!

Because he’s only 8 months old and hasn’t developed fine motor control yet, he can’t grasp the pieces with a coordinated pincer grip.  He manages to use his thumb and index finger quite well, but then the food gets stuck to his hand and he ends up putting half his fist in his mouth in a desperate attempt to get some food.  This frustrates him greatly and sends him into crying mode, so I decided to stop for a while and wait for his coordination to improve.  I’ve also tried giving him large pieces of fruit that he can hold in his hand and munch on, but he ends up taking huge bites that he can’t mash with his gums, and he freaks me out when he starts to gag and turn red, so that’s not working either.  He does very well with bread rolls and veggie puffs, and we can see how happy he is when he’s feeding himself, but the fruit isn’t working well just yet.

Today I received some amazing white peaches from our CSA.  I wanted Zach to experience the joy of biting into a super-sweet late summer peach, so I cut up half a peach into small bite-sized pieces and placed them in front of him after his meal.  He tried grabbing one piece, it got stuck on his hand, and he wailed in frustration.  I pulled the sticky piece off his hand and he grabbed my wrist to lead my fingers to his mouth!  This gave me an idea…

I took out a small fork, speared a piece of peach and fed it to Zach.  He was delighted!  So, I speared another small piece but this time I left the fork sitting on the edge of the plate.  Zach immediately grabbed it, brought it to his mouth, and expertly pulled off the piece of peach with his lips.  We repeated the process and Zach happily ate the rest of his peach with his fork!  Not once did he poke himself, and he had a great time feeding himself with minimal intervention.

I’ve read on mainstream parenting websites that you shouldn’t introduce the fork until after 12 months of age because babies can poke their eyes or hurt their gums.  I had used the fork to feed him fruit before, and it was clear that Zach knew exactly what the utensil was for.  He didn’t wave it near his face, nor did he stab himself in the mouth.  A little trust goes a long way when working with babies, I feel.

We tried it again in the evening with my husband and I took some video of the process.  I’m really excited that Zach is exploring yet another facet of independent eating.  His eagerness and focus let me know that we’re on the right track.

Uncategorized

Montessori Mealtimes

I come from a Hispanic culture, where mealtimes are sacred.  As children, we were expected to have breakfast, lunch, and dinner sitting down at the table.  We were also expected to remain seated throughout the meal, have appropriate table manners, and join in or at least listen to the conversation.  Weekend meals at home and in restaurants were three-hour affairs, especially as my brother and I got older and could partake in adult discussions about politics and current events.

Those times around the table were the happiest moments of my childhood.  I felt accepted, respected, and part of a unit.  I learned to debate my viewpoint and accept counter-arguments.  I discovered that food wasn’t just sustenance; it embodied culture, heritage, family history, art, science, pleasure and yes, even some pain.  Mealtimes taught me discipline, respect for my elders, pride in my cultural heritage, and the joy of service. 

I want the same experiences for our child, and I know that to get there I have to start now.  I want Zach to understand that mealtime is a pleasurable moment of the day where one can relax, converse, and savor food.  I also want him to understand that there are certain expectations during mealtime: he should remain seated until everyone has finished; he shouldn’t play with his food; he should try at least two bites of everything; and he should join in the conversation or listen attentively.  To parents whose children get up and run around the dining room, play with their food, eat only chicken nuggets, or demand to watch TV during mealtimes, these expectations might seem a bit unreasonable.  I feel that they are achievable – and important – goals that any child can reach with the right preparation.

When Zach was younger and started eating solids, I would prepare his meal while he played on the floor and would bring him to the table when everything was ready.  Little by little, I’ve set up a mealtime routine that emphasizes the qualities I want to help him develop.  I always announce mealtime to him, place him in his Tripp-Trapp at the dining room table, and give him a toy so he can entertain himself while I warm up his meal.  When I first started doing this about 4 weeks ago, he would throw a fit from the moment I sat him down to the moment the first bite of food made it into his mouth.  As a very hungry five-month old, he did not understand the concept of waiting.  I persevered, letting him watch from the table as I prepared his food, telling him what I was doing each step of the way, and assuring him that his food would be ready soon.  This morning, I was amazed to see how much patience he has developed in just a few short weeks!  He no longer cries while he waits, and instead watches me as I move around the kitchen and plays quietly.  If you want to teach a child how to wait, the best way to do it is to give him opportunities to wait! 

I also want him to understand that we don’t get up from the table during mealtimes.  To model this behavior for him, I had to make sure I had everything necessary for his meal.  After a couple of weeks of kicking myself every time I realized that I had forgotten something in the kitchen, I decided to buy a tray. Problem solved!  Now, while his food is steaming, I prepare his glass bowls, cloth napkin, cleaning towel, spoon, glass, water pitcher, and fruit compote.  When his food is ready, I place it on the tray and bring everything to the table.  It’s such a relief to know that I have everything I need in one place! 

Right now Zach can’t leave the table until I take him out of his chair, but we chose his Tripp-Trapp precisely because it will give him the freedom to climb into and out of his chair when he starts walking.  I want Zach to develop the necessary discipline so that he can remain at the dinner table of his own accord,and this starts by modeling.  (If you think it isn’t possible for a toddler to sit for meals, I invite you to visit a Montessori Infant Community, where children as young as 15 months sit together for 20-30 minutes, enjoy their meal quietly and respectfully, and then clean up on their own).

While Zach eats, I talk with him.  I must admit that having one-sided conversations takes some imagination!  I tell him what he’s eating, ask him if he’s enjoying it, and discuss either what we’re going to do that day or what we did during the day.  I don’t ramble on during the entire meal, because it’s also important to let him focus on the act of eating and allow him to explore the flavors and textures of his food.  I make sure we establish eye contact while we talk, and I respond to his babbling with smiles and verbal acknowledgment.

During mealtimes, I make it a point not to answer the phone or check my e-mail and I expect my husband to do the same when he joins us for dinner.  Sometimes I have to put off eating dinner until Zach is done because I can’t juggle eating and feeding him at the same time, but at least we are all sitting together and Zach and his dad are enjoying each other’s company at the dinner table.

Montessori teachers are often reminded to “teach by teaching, not by correcting”.  This means that you should model appropriate behavior, set reasonable expectations, and prepare the environment so that you and your child are successful.  By so doing, you avoid having to nag, threaten, and punish.  It takes a bit of planning and discipline, but the results are worthwhile and extend to other areas of the child’s life!

Uncategorized

Making the Soup

Last week I wrote about our experience with the Jaramillo Soup.  The beauty of this soup is that you can make it with whatever you have in your fridge, so it’s economical and uncomplicated.  When I started making it for Zach, I began by giving him 2 oz. three times per day, mixed with breast milk (plus nursing on-demand the rest of the day).  This meant that I was making about 1/3 of the recipe featured here.  I gradually increased the amount of soup based on his demands and hunger level.  By six months of age, he’s drinking four 9-oz. bottles of soup each day (plus purees for lunch and dinner made from other things like sweet potato, corn & spinach, etc. to practice spoon feeding).*  When you see how much he eats you’ll find it shocking and cruel that anyone would expect THIS big baby to be on a breast milk-only diet until he turned six months.

*Since I started this post a week ago (hello, busy life) I have weaned Zach from the bottles and I’m spoon-feeding him 100%.  This is described at the end of the post.

Ingredients:

Vegetables

  • 1 chard leaf
  • 1 kale leaf
  • 1 lettuce leaf
  • 1/2 zucchini
  • 5 green beans
  • 1 large broccoli floret
  • 1 celery stalk
  • 1/3 sweet potato

Legumes & grains (soak all legumes and brown rice the night before)

  • 1 tbsp. mung or azuki beans (or any beans you have)
  • 1 tbsp. green lentils (or yellow or brown)
  • 1 tbsp. brown rice
  • 1 tbsp. quinoa (doesn’t need to be soaked)

Animal protein (a portion approximate to the size of your baby’s palm)

  • Dark meat chicken, grass-fed beef, chicken livers* or fatty fish (i.e. salmon)

*Liver can cause constipation but it’s a great source of nutrition, so play it by ear and go easy at first.

Fruits

  • 1/2 avocado
  • 1 sliver of papaya (approximate size = three of your fingers)
  • 6 prunes
  • five chunks of mango, 1/2 peach, handful of blueberries, OR any other seasonal fruits without the peel (note: NO bananas, strawberries, or citrus)

Optional: DHA cod liver oil for babies (2-3 ml) or a tbsp. of quality olive oil

Water: Ideally use spring water or reverse osmosis water, but at least use purified water (no tap water!!)

Equipment: pressure cooker (or regular soup pot, but it takes longer)*, blender, ceramic or glass bowl, glass bottles, cross-cut nipples (use a sharp knife to cut a cross in the nipple so the soup will go through).

*I have a T-Fal pressure cooker; it’s affordable and works really well.

Instructions:

The night before, measure out the legumes and grains and leave them soaking in two cups of purified water in a glass or ceramic bowl (no plastic, even if it’s BPA-free!).  You can

You can chop up the veggies or cook ’em whole.

also prep baggies with washed and pre-measured veggies for the whole week (note: if your veggies are not organic, make sure you disinfect them with grapefruit seed extract).  Do the same thing for the animal protein; portion the meats, wrap them in parchment paper and then put them in baggies to freeze.

I prep the veggies every Sunday.

In the morning, pour the legumes and grains into your pot with the water they soaked in, and add the vegetables and animal protein.  DO NOT put in the fruits or oil, and DO NOT use any sweeteners or seasonings.

Cover the pressure cooker and turn on the heat as hight as it will go.  When it has built up pressure and starts steaming, turn down the heat to medium-low (just enough to maintain pressure) and set a timer for 15 minutes.  Alternately, you can pressure cook the grains and legumes for 10 minutes, bring down the pressure, add the veggies and protein, increase the pressure again, and pressure cook for five more minutes (I just find this to be more of a hassle).  If you are using a regular pot, you will have to let the grains

Grains, legumes, veggies and animal protein ready to cook.

and legumes cook for about 45 minutes, then add the veggies and cook for an additional 15 minutes.

Meanwhile, put the fruits and oil in a blender.  When the timer goes off, quick-release the pressure and transfer all the soup ingredients from the pot to the blender.  Blend on the highest setting for at least 30 seconds, or until everything has been perfectly pureed because little chunks of food can clog the nipples.  (I bought a $15 Oster blender with a glass blender jar, and it works great on

“liquify” mode). If the soup is too thick, add a little more water or some 100% organic fruit juice (I like prune, pear, or apple).  It takes a few days to get the consistency just right; have a toothpick handy to unclog the nipple if necessary.

Pour the soup into the bottles, screw on the nipples, put on the caps and put the bottles immediately into the fridge.  Try to put them on a bottom shelf, not in the door racks, so that they’ll stay very cold.  If your fridge isn’t very cold, put ice in a large container and nestle the bottles among the ice, and then put the whole thing in the fridge.  Failure to cool down the bottles can cause your baby to have gas, especially with the afternoon and evening feedings.

Ready to blend…

It sounds like a huge hassle to make the soup, but it’s actually quite quick once you have a system.  It takes me about 30 minutes each morning, and I can rest assured knowing that my child has wholesome, healthy, and home-cooked meals for the rest of the day.

CAVEAT: You MUST makethe soup fresh each day.  This soup should not be stored overnight nor should it be frozen.  Your child deserves fresh food to get off to a healthy start!

To heat up the bottles, you can use a bottle warmer (I have the Dr. Brown’s warmer and it works great if you set it for 5:30 minutes).  Always make sure to shake the bottle thoroughly to even out the soup temperature and test the soup on your hand before giving to baby.  The soup should be served warm.

Yummy!

If you are going out, take the soup in a thermal bag with ice and make sure it stays as cold as possible.  To reheat on the go, ask for a large cup half-filled with hot water and immerse the bottle for 5-7 minutes, then shake.

It is also possible to make the soup thicker and spoon-feed it to baby.  Now that Zach is eating really well with a spoon, I am making three separate purees from the items I cook (I still cook everything in one pot but I use less liquid during blending to ensure a thicker consistency):

  1. A puree made from legumes, grains, a 4-minute egg yolk and some pastured butter (this is for breakfast and mid-afternoon meal)
  2. A puree made from veggies, animal protein, and cod liver oil (this is for lunch and dinner)
  3. A puree made from the fruits and avocado (this is “dessert” after each meal)

    Bottoms up!

In just two days, he successfully weaned from using the bottles, which he had been using since he turned 3 months.  He LOVES to eat with a spoon and has made great progress in that department.

This soup has changed our lives for the better.  Our child is happy, healthy, strong, and sleeps like a champ.  It’s never too late to start making it!  If you have any questions on how to make it, please e-mail me or leave a comment.

The first time we tried spoon-feeding the soup… It’s gotten a lot better since then!