Uncategorized

Life’s Three-Period Lesson

In the Montessori Three-Period Lesson, a child learns a new concept, then practices the concept, and finally shares their new knowledge.  I’ve been a Montessori guide for 12 years, a Montessori mom for eight, and a Montessori homeschooling parent for two.  During my “first period” I earned two AMI diplomas, a Master’s degree, and certifications in Positive Discipline and Orff Music.  During my “second period”, I honed my Montessori practice working with children and parents in schools and homes (including my own). I now find myself ready to embark on the “third period” of my journey: Sharing my hard-earned knowledge with others.

I’m up every morning at 5 A.M., coffee in hand, developing the new Mainly Montessori website. That’s where you’ll find my blog from now on, but you’ll also find The Montessori Homeschool Hub, an inspiring online membership community for homeschooling parents who want to understand and apply Montessori. I want to offer a clear roadmap that provides clarity and confidence for the homeschool journey.

600px-logo

I hope you’ll continue to follow my musings and experiences on my new website.  And if you’re a parent who’s interested in bringing Montessori into your home in simple yet powerful ways, then please join my waitlist so you can be the first to know when membership enrollment opens.

Thank you from the bottom of my heart for coming this far with me; I look forward to the next phase of our journey.

6 - 12, Cosmic Education, Science

Worm Moon

Tomorrow we’ll have the first Supermoon of the year – the Worm Moon!  Do you know where the name comes from?  Here’s a short story I wrote (meant to be told orally).  I hope you can share it with your children, or at least enjoy its message.

*****

Look up!  What do you notice?  Did you observe that the full moon is larger than usual?  We call it a Supermoon, and your eyes aren’t deceiving you… The moon IS larger than usual because it’s closer than usual, and that’s because the moon’s orbit around the Earth isn’t perfectly circular – it’s elliptical.

Every Supermoon has a special name, and today I want to tell you where this one’s name comes from.  Let’s go back five or even ten thousand years ago, to when the native people of this country lived in harmony with nature.  During Winter, the humans who lived between Lake Superior and New England in what is now the United States hunted, wore animal skins, made fires, and took shelter from the snow.  They waited patiently for Spring to come, but they didn’t have calendars like we do. Instead, they observed nature to know when the seasons were changing.

Every year, around this time, they noticed tiny, dark brown pellets on the cold, slowly-thawing ground.  These pellets – we call them castings – were a clue for them, a message from nature that warmer weather was ahead. When these castings appeared, so did something else: robins – grey birds with bright orange breast feathers.  The robins weren’t eating the castings, because castings is just a fancy word for poop! They were preying on the animals who left the castings. Can you guess which animals the birds were eating?

Yes, worms!  Earthworms! The appearance of worm castings told humans that warmer weather was on its way, because the ground was now soft enough for the worms to move through it.  The presence of worms also indicated that the land was almost ready for planting, since these animals do the important work of aerating the soil and their castings help plants absorb more nutrients. 

Earthworms came to signify the end of winter and the approach of the planting season, which meant fresh food and survival for another year.  And thus, this Supermoon became known as the Worm Moon.

Other human groups have given it different names, like Crow Moon, Crust Moon, and Sap Moon.  You can investigate the stories behind these names and let us know what you discover. But for now, when we look up at the Worm Moon, we can think back to those patient and resourceful people who didn’t need paper calendars, because they lived in harmony with the Earth.

supermoon

3 - 6, 6 - 12, On Parenting, Siblings, Social and Emotional Learning

Raising Creative Problem-Solvers

Do you constantly referee children’s disagreements?  Do you tend to side with one child, frustrating the other?  Or do you offer solutions, only to be ignored?  If you’re nodding in response to any of these questions, this will help…

The scenario:

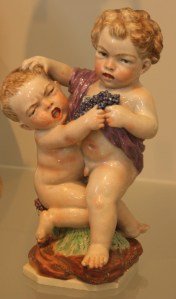
My 4.5-year-old daughter and 8-year-old son share a room.  It’s the only place in the house where they’re allowed to play LEGOs, so the plastic pieces don’t take over ourBLW_Two_Bacchic_Putti_Fighting living room/homeschool area. Both kids love LEGOs, but my older son likes to listen to audiobooks while he builds, and my younger daughter prefers to work in a quiet space.  This causes quite a few arguments and screaming matches. They both came to me frustrated and in need of help to share their living space.  It was the perfect opportunity to engage in problem-solving through brainstorming!

Step 1: State the problem

I asked them a few guided questions to come up with a statement defining the problem.  We determined the problem was “Difficulty building LEGOs at the same time in the same room with different noise preferences.”  Try to state the problem as clearly and precisely as possible, to encourage effective brainstorming.

Step 2: Brainstorm solutions

I told them they were both creative problem-solvers and we’d use their skills to find a solution that works for everyone.  During brainstorming, possible solutions are written down without being evaluated.  Anything goes, even the craziest solutions.  You might have to remind children (and yourself) of this because our brains are wired to immediately weigh solutions for their effectiveness, and it can be hard to sit with the discomfort of what are clearly implausible answers.

If you’re worried that the children will waste your time coming up with useless harebrained solutions, remember that they are motivated to solve their problem.  If you don’t react and just write down their ideas, they’ll eventually refocus on tangible solutions.  Plus, some of those crazy solutions are a great way to let them exercise their imagination (and who knows, they just might work)!  Resist the temptation to offer suggestions, even though you can probably see a clear path towards an amicable solution if they just did what you think is best.  This is their problem, and they have to own the solution by coming up with it.  You can act as the scribe so they can focus on finding solutions.

My children’s brainstorming list included:

  • wear wireless headphones;
  • be allowed to play LEGOs downstairs;
  • lower the volume of the audiobook;
  • take turns using the room (while the other person plays non-LEGO games downstairs);
  • no more audiobooks;
  • put up with the noise;
  • read books downstairs;
  • play in the room together listening to audiobooks part of the time and without audiobooks the other part.

Step 3: Eliminate implausible solutions

Once they’ve exhausted their ideas, review the list with them and tell them that they get to cross out any ideas that don’t meet the following criteria:

  • Respectful (to all involved, including bystanders),
  • Realistic (ideas you can execute within the boundaries of your environment),
  • Related (the solution must attempt to solve the problem)
  • Helpful (improves the lives of all involved)

Keep the process objective by focusing the four criteria.  If a child says, “That idea is dumb,” you can invite them to elaborate by asking, “Is it respectful? Realistic? Related?  Helpful?”  Here you CAN give your opinion, but only after your children have had their turn nixing ideas.  In our situation:

  • They realized that their ideas to “put up with the noise” and “ban audiobooks” weren’t respectful, so they crossed those out.
  • The suggestion to “read books downstairs” wasn’t related to the problem.
  • They’d tried “lowering the volume” in the past, but my daughter was still able to hear it and it meant that my son had to have one ear glued to the device, so that wasn’t realistic.
  • I wasn’t comfortable with my son walking around with wireless headphones all day for several reasons (health, safety, disconnection, etc.), so I mentioned this and we crossed that one out.
  • “Playing LEGOs downstairs” isn’t realistic or respectful because we know from experience that the little plastic pieces quickly overtake our common living/learning area. It goes against the boundaries of our environment, so it was eliminated.

Step 4: Choose one solution from the ones remaining

By the end of this process, the children were down to two solutions: “play in the room together listening to audiobooks part of the time and without audiobooks the other part” and “take turns using the room and playing something else downstairs.”  They chose the latter, and we discussed the details of how that would look (the younger one plays downstairs from wake-up to lunch, and then they switch in the afternoon).  Then I told them that we’d try the solution for one week, and revisit it to make adjustments if necessary.

Step 5: Set them up for success

This is where YOU come in.  Your role is to help them adapt their routine, environment, and expectations so they can stick to the solution for the week.  Without a solid plan, it’s very easy to fall back into old habits (and arguments).  You are there to hold boundaries, remind them of their solution, and empathize if things aren’t working out the way they envisioned.

Solutions are rarely perfect at first, and require fine-tuning.  Observe what’s working and what isn’t, so you can guide their follow-up session.  For example, two days into the trial period, my daughter approached me with a different solution.  I acknowledged her viewpoint, reminded her of our agreement, and told her we would revisit the solution in five more days.

I’ve used this Positive Discipline approach with children in my Montessori environments for years, and after a few guided sessions, the children begin to use it on their own.  It’s a fantastic way to empower them, raise creative critical thinkers, and remove yourself from the middle.  Let me know if you try it, I’d love to hear how it goes.

6 - 12, Cosmic Education, Science

Story of Chemistry: Part I

I wrote this story a while back for the Upper Elementary group I inherited that hadn’t been exposed to chemistry.  I never got around to writing Part II but if you take on that challenge, let me know!

*******

Pretty much all that we see or touch in our seemingly solid existence is made from an unimaginable number of tiny atoms, each a different type of element or building block. When you combine these atoms in different ways, they make up everything that we can see in the Universe.

Do you remember when we told the story of The Origin of the Universe? We talked about an enormous cloud of gases that swirled in Space. These particles started to come together as the Earth cooled. Some became solids, some turned into liquids, and some remained gases. The rain, the oceans, the rocks, and the air were all made from different combinations of elements, and later on, life also emerged from these same building blocks.

Humans have tried to understand elements since the dawn of recorded time. Copper, for example, has been used since at least 9000 BC. That’s more than 11,000 years ago! By the time of the Ancient Egyptians, around 5,000 years ago, seven metals had been discovered and were being used for everything from weapon-making to jewelry. The Egyptians had a strong connection between the metals, the cosmos, and their fertile land, and called this study Khem.
egypt

The ancient Chinese, around the same time period, thought that everything was made of five elements: water, wood, fire, earth, and metal. They used these ideas in their development of acupuncture. In India, they were also studying matter, and discovered how to use the color of fire to identify different types of metals.

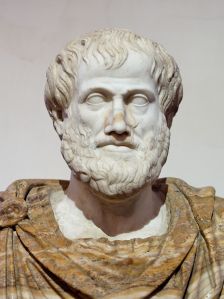
When the Greeks conquered Egypt in 332BC, they became interested in the Egyptian theories of how matter was made. They turned the word Khem into Khemia , which became the Greek word for “Egypt.” Around that time, the Greek philosopher Aristotle decided that the building blocks of all matter should be called elements. According to him, there were five: earth, air, fire, water, and quintessence, which formed the heavens.

aristotle

In the 7th century AD, Egypt was invaded by the Arabs, who added the prefix al- to Khemia. And thus, the science of alchemy was born. For centuries, Arab alchemists used what they knew about elements to try to discover a way to make a substance that would make humans immortal. They also wanted to turn ordinary metals – and other substances – into gold, the most valuable of metals.

When the Arabs invaded Spain, they brought their ideas of alchemy with them and kindled the curiosity of many scientific minds in the European continent. The search for a way to make gold, known as the “philosopher’s stone,” drove many scientists to try some very odd experiments indeed! A German alchemist, Hennig Brandt, tried boiling down urine, thinking he could find gold in the yellow liquid. What he discovered, quite by accident, was a new element: phosphorus!

brandt

Why was this so ground-breaking? Because phosphorus, rubbed the right way, would burst into fire (guide lights match). It went on to be used in the invention of matches. Brandt had proven, by accident, that substances commonly found in nature could be “turned” into something valuable. He hadn’t really turned urine into phosphorus; he’d just separated the phosphorus from all the other elements that combine to make urine.

Brandt’s discovery caused many alchemists to look around and wonder: What’s all of this made of? Have you ever wondered that, too? Think about air, for example. Humans have always felt air and they’ve seen its effects during hurricanes and tornadoes, but they never understood what it was.

In the late 1700’s, this all changed when an amateur British scientist named Joseph Priestly discovered several “new airs,” as he called them. Priestly wasn’t a scientist by trade; he was a teacher and writer. However, he loved to play around in his lab at home. One day, he poured acid on a powder, trapped the air it produced, and used it to to put out a flame. (guide performs “carbon dioxide extinguishes fire” experiment) He had discovered carbon dioxide, and later went on to discover eight other gases!

In 1767, Priestly lived next to a brewery – a place where they make beer. He noticed that over the vats where the beer was fermenting, there was a haze of carbon dioxide. He collected this gas, mixed it with drinking water, and invented carbonated water, which he called “windy water.” (guide opens bottle of carbonated water and serves to children)

Now, around that time, sailors in the British Navy were suffering from a deadly illness called scurvy. As you can imagine, a Navy full of sick or dead sailors can’t win any wars! Priestly thought that his windy water could be a cure for scurvy, so he wrote to the British Navy asking them to test his theory. The French Navy was also struggling with this malady, and Priestly’s potential secret remedy was stolen by a French spy! It made its way to the French Navy, who contacted one of France’s most intelligent scientists, a young man named Antoine Lavoisier.

scurvy_Full

It turned out that Priestly’s windy water, though refreshing, was useless against scurvy. However, it would help to transform alchemy into a serious science: chemistry. But that’s a story for another day…

3 - 6, 6 - 12, Theory and Practice

Montessori Red Flags

Some parents choose a private school based on location, ratio, or test results.  But if your child is in a Montessori school specifically because you want them to reap the benefits of a Montessori education, I have some disconcerting news: The burden is on YOU to ensure the school is following authentic Montessori practices.

The name “Montessori” is not trademarked, so anyone can use it and steal the educational philosophy’s reputation (and your hard-earned money).  And many so-called “Montessori schools” pick and choose to which principles, if any, they adhere.

You may be wondering, isn’t a little Montessori better than nothing?  Not really.  Imagine the Montessori approach as a finely tuned instrument, whose parts work together to bring out the musician’s full potential.  If the strings are too loose, the sound is warped and uninspiring; tighten them too much and they’ll snap.  Similarly, out-of-tune Montessori programs are either:

  • Too loose: They let students do whatever they want, resulting in children who don’t develop self-discipline, accountability, and social responsibility; or
  • Too tight: They drastically restrict students’ freedom, producing anxious children who lose their curiosity, creativity, and love of learning.

Lucky for you, here’s a list of six red flags that will let you know whether or not a school follows authentic Montessori practices.

RED FLAGS

Short work period with pull-outs or other interruptions: Authentic Montessori schools give children (ages 3+) three solid hours of uninterrupted work time in the morning and two in the afternoon.  Uninterrupted means NO pull-outs for art and music; NO break for whole-group snack; and NO mandatory circle time.

Age groups that don’t span at least three years: Authentic Montessori schools group children by developmental stage (Primary is ages 3-6; Elementary is 6-9 and 9-12 or 6-12; Adolescents are 12-15).  Schools with a “transition classroom” for kindergartners; those that group kindergartners and first-graders together; or those that only have a two-year age range from Primary onwards are denying children the powerful benefits of the mixed-age group.

Co-teachers that split subjects: Authentic Montessori classrooms are directed by ONE adult who’s trained and certified to work with that particular age range. One or two assistants serve as support staff for safety and to satisfy state ratio laws.  Co-teachers that divvy up subjects (where one only teaches math and sciences, while the other focuses on humanities) are not following an authentic Montessori model.

Elementary expectations in the third year of Primary: Authentic Montessori schools protect the right of five- and six-year-old Primary students to put into practice the skills they developed in the prior two years (independence, self-regulation, collaboration, leadership, etc).  Schools that claim to be preparing third-year Primary children for Elementary by mandating daily math and writing, requiring they only work on paper, giving them checklists and work plans, or limiting positive social interactions are impairing the very abilities the children worked so hard to develop.

Traditional education techniques: In authentic Primary and Elementary Montessori classrooms, children learn through the hands-on exploration of Montessori materials.  If you visit a classroom and see the materials gathering dust on the shelves or being used to solve worksheets, you can be sure you’re not in an authentic Montessori environment.  Other red flags include mandatory spelling tests (or tests of any kind) and grade-level lesson groups, which segregate children by age and effectively eliminate most mixed-age interactions in a mixed-age classroom.

Rewards and punishments: Authentic Montessori schools see challenging behaviors as opportunities to practice and teach empathy; they celebrate growth by acknowledging effort and progress.  Classrooms with a “thinking chair” or a time-out corner, where a child is sent when their behavior is deemed inappropriate, are not following Montessori principles.  Neither are those where the children are rewarded with stickers or phrases like “good job” or “you’re so smart.”

So, what can you do if you’ve just discovered that your child’s school needs some fine-tuning?  Take action!  Choose one red flag, educate other parents, and talk with school leaders.  Then choose the next one, and the next.  Schools often stray from Montessori because they think parents want a more traditional educational approach.  Prove them wrong! Your return on investment from a Montessori school should be an education that respects and supports your child’s development.


6 - 12, Cosmic Education, Montessori Materials, Montessori Theory, Theory and Practice

The Art of Introducing a Lesson

Often, the most challenging part of giving a lesson is getting the children excited and ready to learn.  Here are seven strategies to ensure your presentation gets off to a good start.

1. Check your attitude: You need to believe in the value of what you’re going to present. The children will smell your fear or hesitation a mile away.  If a particular topic scares you, spend more time with it.  Read, listen to podcasts, watch videos, use your hands to explore the concept, and find new ways of looking at the subject.  When you love it, your students will likely love it.  If you’re worried your lesson will be boring, practice ahead of time. A trainer once told me that during the first year you teach in a classroom, you need to practice every single lesson ahead of time.

2, Prime the pump: Sometimes, I’ll  start a conversation about the topic a while before the lesson (like at breakfast or in the car). And that way, when it’s time for the lesson, I can say: “Remember when we talked about how angles can be found in buildings, trees, baseball fields and playgrounds? Well, did you know that some of those angles you saw have names, just like you have a name? Look over here…”

3. Play to their sensitivities: Second-plane children have a sensitivity for imagination.  For the first time in their lives, they can craft in their minds wondrous images that they’ve never seen or experienced before.  They also have a sensitivity for knowledge and culture; they want to know the why and how of everything.  Use that to your advantage by starting your lesson with: “Have you ever wondered…” or “Have you ever noticed…” 

4. Tell stories: “We’re wired for story”, writes Brene Brown.  And it’s true.  I recently told my seven-year-old son a funny story about dealing with a pushy bike salesman; he asked me to re-tell it five times in a row and laughed heartily each time.

“Travel stories teach geography; insect stories lead the child into natural science; and so on.”

– Dr. Maria Montessori

Tell lots of stories! In the car and during meals, get used to telling funny, interesting, and moving stories about your own life.  Do this to hone your craft, but also because when you introduce a lesson by saying, “I have a story to tell you”, they’ll be more inclined to listen.

For story-telling inspiration, listen to this podcast episode where master storyteller Jay O’Callahan shares his strategies for crafting a good story (and tells a wondrous story of his own along the way).  For stories that tie into the Montessori elementary curriculum, read “The Deep Well of Time” by Michael Dorer.

5. Entice them with interesting follow-up work: Sometimes it’s great to let children choose how and when they’re going to follow up on what you’ve presented, but other times, dangling an enticing follow-up activity will draw them to the lesson.  Don’t divulge too much information; offer just enough detail to draw them in.  You could say, “How would you like to draw all over the kitchen floor?  When we’re done learning about different types of angles, you get to do just that!”  Suddenly eyes are wide open, faces are turned towards you, and the children are ready to learn.  If they ask you questions about the mysterious follow-up, you can just lightly say, “Ahhh, you’ll find out soon enough!”  This approach works particularly well for lessons that are more dry and straightforward.

A08D021E-3CA3-448F-89A2-0BAE7F2C4552

6. Ask for helpers: To get and keep children engaged, let them get their hands on the materials as soon as possible.  Give them jobs ahead of time so their presence at the lesson has some significance to them.  “Today I want to show you something the Ancient Egyptians discovered five thousand years ago, that we still use in our lives today.  Zach, can you be in charge of the push pins?  Bill, can you be the stick selector?  Olivia, can you be the label reader?”

7. Be ready: In my trainings, I was told that you prepare all the materials with the children prior to the lesson so they know where everything is and what they need.  However, I’ve found that in my homeschooling environment, it helps to bring out the materials ahead of time, feature them attractively, and direct the children’s attention towards the rug or table when they seem to be at a good stopping point in their other work.  This works particularly well for my seven-year-old son and his elementary-aged friends who visit us to use our materials (I still follow the more traditional approach with my Primary-aged daughter).

Now, go forth and, as Dr. Montessori used to say, “seduce the child”!

_The secret of good teaching is to regard the child’s intelligence as a fertile field in which seeds may be sown, to grow under the heat of flaming imagination. Our aim therefore is not merely to make the child under (2)

*This post includes affiliate links.

3 - 6, 6 - 12, Math and Geometry, Montessori Materials, Uncategorized

Long Live the Short Chains

The Montessori Short Chains and Arrows pack a big learning punch and are often under-utilized.IMG_4716  They’re great for a homeschool environment because they don’t take up any shelf space.  Their initial purpose is to help the child first count linearly and then skip-count.  But when your child is comfortable with these two concepts, you can use the chains for much more!  Here are four ideas…

IMG_4657Find the number: Ask the child to set out the hundred chain with the corresponding arrows, while you cut up a few blank paper arrows (cut little rectangles and trim the corners to make arrows).  Write a number on the arrow (any number between 1 and 99) and have the child place the arrow on the corresponding bead.  If you notice mistakes, you can either let it be for now (and encourage more practice) or invite the child to count from the nearest tens-arrow (e.g. if the paper arrow says “26” and it’s in the wrong spot, invite the child to count linearly from the “20” arrow).

When they get comfortable with this activity, you can place blank arrows on random beads along the chain and ask the child to write down the numbers on the arrows. Later the child can do the same activities but without the tens arrows as guides.  You can ask questions like, “What number would you reach if you added 10 beads to 26?” or “What number would you reach if you counted backwards 8 beads from 45?”  You can do all these activities from around the age of 5 if counting skills are solid.

Find the missing number in a sequence: When a child knows how to skip-count, youIMG_4500 can present a new challenge by having them find the missing number in a number sequence.  The first few times you do this, you can use the regular arrows for any chain and hide one behind your back.  Ask the child to lay out the arrows and tell you which one is missing. (e.g. The child lays out 5, 10, 20, 25 and tells you that 15 is missing.)

Later, with the ten-chain, you write sequence numbers on paper arrows and the child has to use addition and subtraction to figure out the sequence and which numbers are missing. (e.g. Make arrows for the numbers 2, 19, 36, and 70 and the child has to lay them out and then figure out the pattern in the sequence and what number arrows are missing).  Help the child verbalize the process he’s using in order to solidify the concept and extend it to any number sequence without the material.  The first part of this work is great from the age of five, and the sequence activity is great from six onwards, increasing in complexity.

IMG_4503

Rounding to the nearest ten: The concept of rounding is not presented in isolation in the Montessori elementary, but is instead part of an ongoing conversation when working with money, estimating, etc.  However, if a child isn’t understanding the concept, you can use the hundred chain to support their comprehension.  Have the child match the tens arrows to the bead chain, and then talk about how the tens are numbers that we can work with easily. Give examples of when we might want to work with numbers rounded to ten instead of exact numbers.

Write the number 62 on a paper arrow and ask the child to place it on the corresponding bead on the chain.  Then ask him what “ten” the arrow is closest to, and explain that 62 can be rounded down to 60 (or is closest to 60).  Do the same with a couple of numbers with the units under 5.  Then make an arrow with a number that has the units higher than 5 (e.g. 68).  Ask the child what “ten” that number is closest to and point out that 68 rounds up to 70.  Then write a number with 5 in the units (e.g. 65) and tell the child that our rule is that if a number has a 5 or above in the units, you round UP to the nearest ten.  Give a couple of examples for the child and then encourage him to make his own examples.  The book “Sir Cumference and the Roundabout Battle” has a lovely story that fits well with this activity.

IMG_4719Polygons: The chains provide a fun exploration of shapes, from triangle to decagon.  Have the child carry all the chains on a tray to a large rug and ask her to make a closed shape with each chain imagining that the center was pressing out evenly on all sides.  Then ask her how many sides each shape has.  If you have a Geometry Cabinet, ask her to find the corresponding shape from the cabinet and put it inside or next to the bead shapes.  The child can write on a slip of paper the number of sides each shape has, and then you can give the names.  You can do a three-period lesson with a Primary child, and you can make an etymology chart with an Elementary child.  The child can also build the shapes around each other, with the square surrounding the triangle, the pentagon surrounding the square, etc.

I hope these fun chain activities bring new life to your bead cabinet!

This post contains affiliate links.

6 - 12, Cosmic Education, Theory and Practice

The Un-Checklist

If you’re a teacher or homeschooling parent who uses checklists to encourage a child’s organization and accountability, then you already know just how quickly checklists can turn into a battle of wills between adult and child.  You also probably sense that checklists hinder freedom of choice.  And you’ve surely noticed that checklists shift the focus of the child’s work away from self-development and flow, and towards task completion and industrial efficiency.

While checklists can work beautifully for a pilot safety-checking an airplane or a hospital staff preparing for a surgery, they wreak havoc on a child’s innate ability to follow his interests in the quest for true mastery and understanding.  There’s nothing wrong with wanting children to develop organization skills and hold themselves accountable.  So, how can we reach these well-intentioned goals without the drawbacks associated with checklists?

In our house, my son and I had a conversation about the reasons for practicing each of the disciplines that are currently a part of his homeschooling journey.  I made a large watercolor circle for each subject and wrote our combined thoughts.

IMG_1262

Then, on one sheet of paper, I started a mind map with the six subjects he’s currently exploring written in the same colors as the individual watercolor circles.  We re-read the reasons for exploring each subject area, and I asked him to think of some interesting topics he might want to learn about.  I connected those interests to the relevant subject areas.  We talked about some topics that I wanted to share with him and I wrote those down as well.

IMG_1265

This became our learning map, and we turn to it daily throughout the month.  Some days I choose what to present and other days he takes the lead.  We add topics to the month’s map as he discovers new interests, and I direct his attention towards the areas of the map that we haven’t visited yet.  Next month, I’ll start a new map and together we’ll discuss what he’s explored to his satisfaction and what he’d like to transfer over, in addition to the new topics we’ll be adding.

I love seeing him stand in front of the learning map, taking in the depth and breadth of explorations and learning opportunities he’s had in just one month.  This map doesn’t begin to capture the richness of his homeschooling experience, with daily adventures in nature, countless opportunities for social interaction, and freedom to play and daydream.  But I think it sends a message that’s developmentally appropriate for his age: Learning is a journey across a vast and varied landscape.  You may spend more time exploring some lands than others, but every stop along the way will enrich you and change you forever.

Montessori Theory, On Parenting, Social and Emotional Learning, Theory and Practice

The Puzzle-Child

Over the years of working in Montessori classrooms I’ve met many children who are eager to attend lessons, engage in follow-up work, and share their new knowledge.  And then there are the occasional “puzzles” (as my son’s Primary guide once referred to him).  How do you know if you live or work with a puzzle-child?

puzzle

Puzzle-children are those for whom learning comes easily but who see most teaching as a hindrance to their own learning agenda. On a good day, they grumpily humor your agenda for a short while and then stealthily slink away to pursue their own interests.  But most days, your invitation will send them into fight/flight/freeze mode: they either become argumentative (fight), run away from you (flight), or shut down (freeze), refusing to speak or make eye contact.

I used to think puzzle-children felt intimidated by the work or lacked the desire to learn.  But these children aren’t insecure or apathetic – quite the contrary!  I started taking the time to connect with puzzle-children to understand why they rejected lessons, and the phrase they said again and again was: “I already know that.”  Upon gentle prodding, it became clear that indeed, they did understand the concepts I was trying to present.

Puzzle children don’t care about your ego. In fact, in a battle of egos, theirs will always win.  They don’t care about sitting politely through your carefully planned presentation or showing you what they know.  They don’t care about your album sequence, the state standards, or your lesson plan.  They know what they want to learn, and they know they can use you as a resource to overcome any gaps in knowledge that pop up as they pursue their own explorations.

And that right there is the key to engaging successfully with a puzzle-child.  You have to be like a floor lamp: present but unobtrusive, and willing to shed light on whatever topic the puzzle-child approaches you about.  The puzzle-child will often be found with his nose in a book; tinkering with random objects; or using Montessori materials in ways that might seem sacrilegious at first but that, upon closer inspection, constitute legitimate intellectual explorations.

Conversations are essential for connecting with the puzzle-child.  But you have to watch your tone of voice: puzzle-children detect the moment you switch to a “teacher” voice, and in that instant you’ve lost them.  They also detect when you’re trying to quiz them.  You’re better off assuming they’re already experts. Use precise terminology when chatting with them; rest assured they’ll pepper you with questions if they don’t know what you’re talking about!

Puzzle-children love stories and experiments, and they are cosmic thinkers (meaning they’re able to effortlessly make connections among seemingly unrelated topics).  They’re autodidacts who focus on a topic until they have filled their cup. And then, just as quickly as the interest blossomed, it seems to disappear (but rest assured that the knowledge remains).

For puzzle-children and their adults, the most difficult times are those when the puzzle-child is between interests.  They’re often restless and irritable, flitting from one activity to another.  This is an important time for puzzle-children, and one should not jump in to fill the void with busy work or adult teaching agendas.  For it is precisely the space and boredom of their aimless roaming that will help them find their next “big thing”.

Puzzle-children don’t need to be taught how to learn.  If anything, they need to be protected from well-meaning adults who want to impose their teaching methods at the expense of the puzzle-child’s creativity and resourcefulness.  It’s a blow to the adult’s ego not to be needed, especially when your entire identity rests on being a transmitter of knowledge.

For teachers and parents of puzzle-children, it’s time to change that identity and protect these powerful and eccentric learners.  Help the puzzle-child learn how to communicate their needs and let them know you’re there as a resource.  Prepare their environment with quality books and essential Montessori materials. Provide open-ended tinkering, building, crafting and drafting materials.  Go outside together and explore nature through their eyes.  Listen, observe, document, trust, and wait.  Be flexible, creative, and honest, and above all, be genuine.  Follow the child.

“Our care of the children should be governed, not by the desire to make him learn things, but by the endeavor always to keep burning within him that light which is called intelligence.” – Dr. Maria Montessori


6 - 12, Cosmic Education, Favorite Books, Montessori Materials, Montessori Theory, Science, Theory and Practice

Moon-tessori (haha, couldn’t resist)

“You’re great at this homeschooling thing because you’re a teacher… I don’t think I could do it because I don’t know much about anything.”

I can’t tell you how many times I’ve heard this phrase since we started homeschooling two months ago, coming from the most capable and well-prepared mothers in my circle of friends.  So here’s a little secret… I don’t know everything.  Heck, I don’t know most things!  But I don’t let that hold me back from learning and sharing with my children.  Here’s an example of how I facilitate learning, and how you can, too!

The moon is a topic that seems to keep coming up in the Full Montessori household.  Over the past few months we’ve read several fiction and non-fiction books about the moon (links at the bottom of this post) and we play games trying to find different shapes (a rabbit, and old man) on its surface.  Seven-year-old Zachary had been asking why the moon changes through the month, so I knew it was prime time for a moon lesson.

Truth be told, even after 12 years as a Montessori guide, I could never quite grasp HOW the moon moved in relationship with the Earth, why the lighted part changed throughout the month, or how to tell when the lighted part was growing or shrinking.  But the beauty of being a guide is that you don’t have to know everything, you just have to “learn ahead of your children” (I love that Charlotte Mason phrase).

So, I found these two extremely helpful videos and FINALLY understood how it all works (thank you, Google)!

Then I dragged my kids to the craft store to buy a foam sphere (without telling them what it would be for); printed, cut, and laminated these free Moon Phases cards; and practiced the Moon/Earth/Sun demonstration when my kids weren’t around.  Yes, sometimes it takes That. Much. Work.

But, you know what?  It was so worth it!  I invited my son to sit down and told him his head was the Earth (my three-year-old daughter wasn’t interested, because, hello concrete thinker!).  I then began slowly moving the moon around his head, and he saw how the lighted part of the white sphere grew from waxing crescent to first quarter.  His eyes widened and his mouth stretched into a knowing smile.  I continued moving the moon around his head and I could tell he was enjoying the discovery process as much as I had.  When we were done and I had casually sprinkled the terms for the moon phases into the demonstration, he got up and went downstairs to play with his sister.

I waited for a lull in their play and pulled out the moon phases cards.  I told him we were going to play a moon game and put the “New Moon” card on the rug.  I lined up the other cards randomly on the edge of the rug and said, “Hmm, which card might go next?”  Eager to apply his knowledge, he quickly fished out the Waxing Crescent card and completed the entire cycle on his own.  He mixed up Waning Crescent and Waning Gibbous, but I didn’t say anything.  I just offered the control chart and he caught his mistake on his own.

IMG_1055

If you’re a Montessorian, you might be wondering why I used the control cards for the lesson (heresy!!).  If you must know, my son has little tolerance for three-part cards.  They just don’t resonate with how he learns.  If he knows the information, he isn’t the type of child who will humor you with busy work just to show you what he knows.  And if he doesn’t know something, he wants to get straight to the knowledge and understanding part right away – and three-part cards just don’t give him that.  I knew (from experience) that if I went through the whole rigamarole of having him lay out the picture cards, finding the corresponding labels, and then using the control cards to check, I’d lose him for sure.

There are about a thousand different ways to help your child solidify their knowledge of the moon phases, or any other concept they’re curious about.  My intention here was to illustrate how I go about preparing myself to facilitate my children’s learning – and often, my own!

it is not enough quote

Favorite moon books:

Fiction: Luna and the Moon Rabbit, Kitten’s First Full Moon

Non-fiction: Jump Into Science: Moon, The Moon Book

The books mentioned above are affiliate links.  Purchasing through these links helps support the quality work you enjoy on this blog, at no cost to you.  Thank you!